Sales Force Integration - Getting started
The process to integrate your organization with Salesforce is divided into a number of definite steps.
- Create a Salesforce user account and generate a security token for your password
- Download the service WSDL
- Prepare to generate the service instance
- Generate the service instance of Salesforce in the K2 blackpearl Service Broker
- Cache the Salesforce credentials
- Create a K2 blackpearl SmartObject and the required property mappings
- Build a user form that enables client users to interact with the K2 blackpearl Salesforce centric SmartObject
1. Salesforce Account
The Salesforce user account is created on the site http://developer.salesforce.com. The individual representing the organization or company creates a user account using an e-mail address and password . Once registered, Salesforce will send a confirmation email to the user account, follow the instructions therein.
The login credentials are important as they are used later on in the integration process to authenticate against the Salesforce site.
Once the account has been created, a security token for the chosen password must be generated.
The image and steps below describe how to do this:
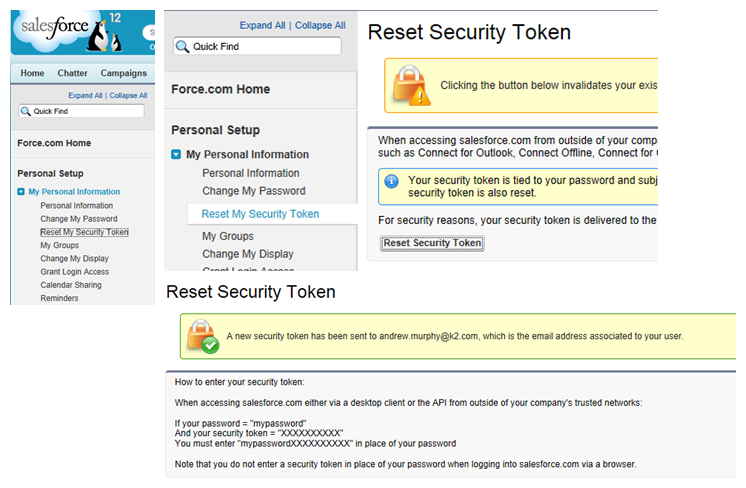
- Log into the Salesforce web site. At the time of this writing, the Getting Started Salesforce page is displayed.
- Click the login name in the upper right corner of the page, this displayers a menu. Select Setup from this menu.
- Click My Personal Information in the navigation bar on the left of the page to expand the menu, then select the Reset Security Token item. Read the important information on the page.
- Salesforce will send an email with the new security token. This token must be appended to the account password to access Salesforce from within K2 blackpearl.
2. Generate and download the service WSDL
Salesforce supplies a Web Services Description Language (WSDL) file to its customers. The WSDL file enables the developer to integrate with Salesforce using the Salesforce API.
The method of generating the WSDL file is beyond the scope of this document but full details can be found on this site:
http://www.salesforce.com/us/developer/docs/api/Content/sforce_api_quickstart_steps.htm
 |
Avoid placing the WSDL and generated DLLs in a location that has spaces or special characters in the path. |
 |
The Enterprise WSDL is organization specific. |
Once you have the WSDL file you can:
- Distribute the WSDL file amongst the developers with your organization.
-
Use the WSDL file to generate the files required for developing solutions in conjunction with Salesforce.
3. Prepare to generate the service instance
As a prerequisite to generating the service instance, the .NET 2.0 SDK must be installed. For more information see: http://www.microsoft.com/download/en/details.aspx?displaylang=en&id=19988
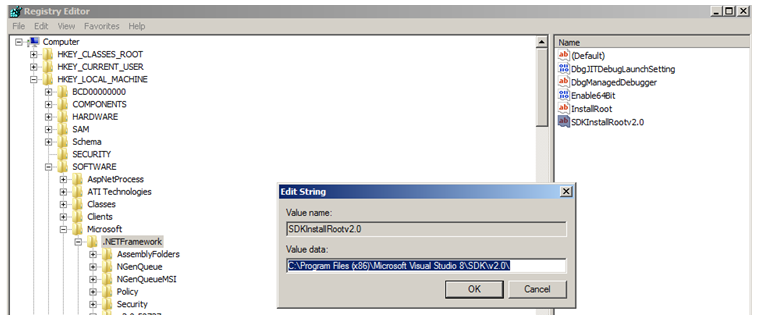
A Windows Registry entry of type String must be created in the following branch, HKLM > Software > Microsoft > .NETFramework with the following data:
Value name: SDKInstallRootv2.0
Value data: <path of the .NET v2 root installation> (this is the folder the SDK installed to)
4. Generate the service instance of Salesforce in the K2 blackpearl Service Broker
Before the service instance can be registered and used, it needs to be generated. This is done by starting the Broker Manager.
- The Broker Manager is started by browsing to the ServiceBroker folder in the K2 blackpearl installation folder and running the BrokerManager.exe file.
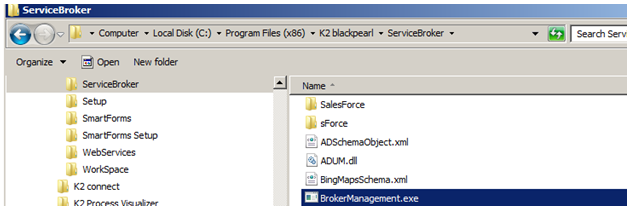
- Select the Salesforce Instance Generator from the list:
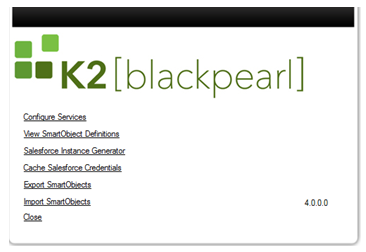
| Service Broker | |
|---|---|
| Configure Service | Configure a new Service |
| View SmartObject Definitions | Enables the SmartObject Definition viewing |
| Salesforce Instance Generator | Generates an Instance of a Salesforce related service |
| Cache Salesforce Credentials |
Creates a user profile for Salesforce users using their credentials
Note: Used only once an instance of Salesforce has been created |
| Export SmartObjects |
Creates SmartObject Deployment Package for export to another environment |
| Import SmartObjects |
Imports SmartObjects from another environment |
- Fill in the Salesforce Instance Generator page remembering to append the security token generated earlier to your password.
|
In the screen shot below, the Instance destination path is a long format path with spaces and ( ) in it, this will cause an error. Rather point to a short path for example: c:\k2SalesForce Once the files have been generated, they can be copied to C:\Program Files (x86)\K2 blackpearl\ServiceBroker\Salesforce and registered from there. |
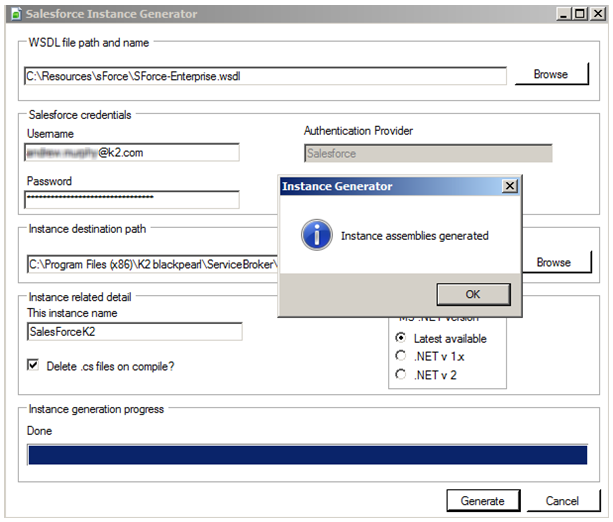
- Choose to register the DLLs and enter credentials (remember that security token with the password)
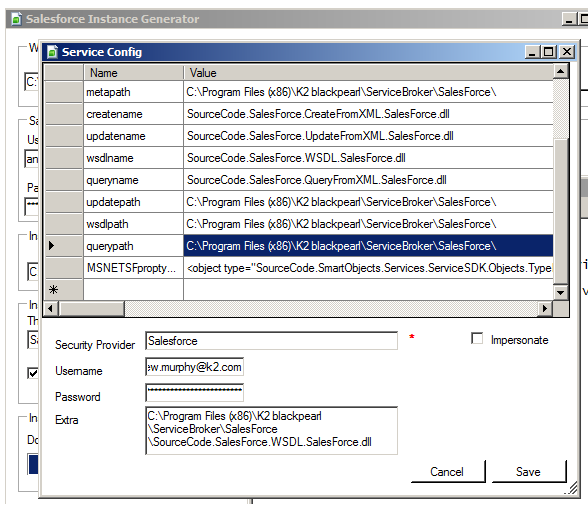
- Once the DLLs have been registered it is important to restart the server to ensure the following step (caching credentials).
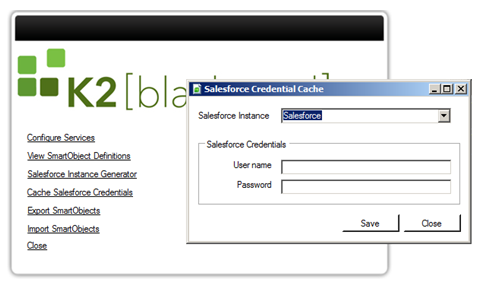
5. Cache Salesforce Credentials
The final step is to cache your credentials by selecting the Cache Salesforce Credentials, again, remember to append the token to the password.